Everywhere I look, these hexagon quilts keep popping up and I am fascinated by them. They remind me of the olden days. I did some research and spent days online looking at all the gorgeous quilts made by others. This pattern is traditionally known as Grandmother’s Flower Garden (GFG) and the hand-piecing technique is called English Paper Piecing (EPP). The flowers generally have a yellow center surrounded by one or two rounds of other colors. However, the hexes are not always arranged as flowers and can take on a more contemporary look when used with bold pattern prints and sewn in various other arrangements. Some quilts are made up entirely of hexagons while other have the flowers appliquéd onto a solid background block.
So I decided to try a small table runner project.....
Step 1: On a hexagon coloring sheet (available freeonline) choose your pattern arrangement and color it in. I couldn't find just the right shade of red for my outside border so I later changed it to dark green.
Step 2: You will need about a hundred or so hexagons for a project this size, more if you want to make a full size quilt. They can be removed as you work away from the center and reused, but will need to remain in the outermost rows until the project is finished. You can buy these pre-cut, but I printed out my own on cardstock paper. Cutting them out while watching TV was quite enjoyable. Just be sure to cut exactly on the line because they all need to be exactly the same size.
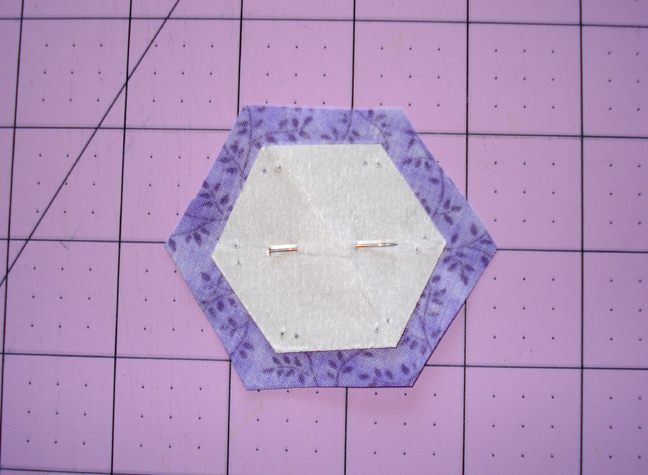
Step 3: Cut your fabric into squares and pin a fabric square to a paper hexagon. I used 3.5-inch squares on 1-inch hexes. Each edge is 1-inch, not the diameter.
Step 4: This step is optional, but if you want to remove some of the bulk, trim the fabric to about ¼ inch around the paper hexagon after you pin it.
Step 5: Fold the edges of the fabric over the hexagon and baste in place going through the paper hex and the fabric. These stitches will be removed later in the project so if you don't knot your thread they will be easier to remove. This is a good place to use up old thread or that last little bit on the spool or bobbin. Make enough of these in each color to complete your design.
Step 6: Place two basted hexagons with right sides together and whip stitch along one edge. (Sorry, there is no photo of this step.) If you are making flowers like I did, start with the center hex and whip stitch the six petals around it, then whip stitch the petals to each other. Eventually, all the sides will be stitched so it doesn't really matter which sides you stitch first, just be sure to follow the pattern so you don't have to un-sew.
Step 7: Add the next row around the flower.
Step 8: At this point you can remove the basting stitches and paper from any hexes that are not on the outside edge.
Can you see how tiny these whip stitches are? I usually get 14-15 stitches per edge.
Step 9: Add in the filler colors and borders.
Step 10: Press front and back.
I haven't exactly figured out how to do the backing or binding on this. I've asked around and some say to cut it off so the edges are straight. I would prefer not to do that. If you have any ideas, please let me know. I can use it like this for a while but I can't wash it until I get it completely finished.
Here are some pictures of assorted Grandmother’s Flower Garden quilts I Googled….. PHOTOS
Be sure to check out my website for new charm packs, layer cakes, and fat quarter bundles. I have lots of new collections from MODA.